Stories
Stories are just one of the “content types” available in LiveWhale. But they’re central to the content strategy behind the new Purchase site. Creating stories, and sharing them with other groups, is fundamental to the new site.
Create or Edit a Story
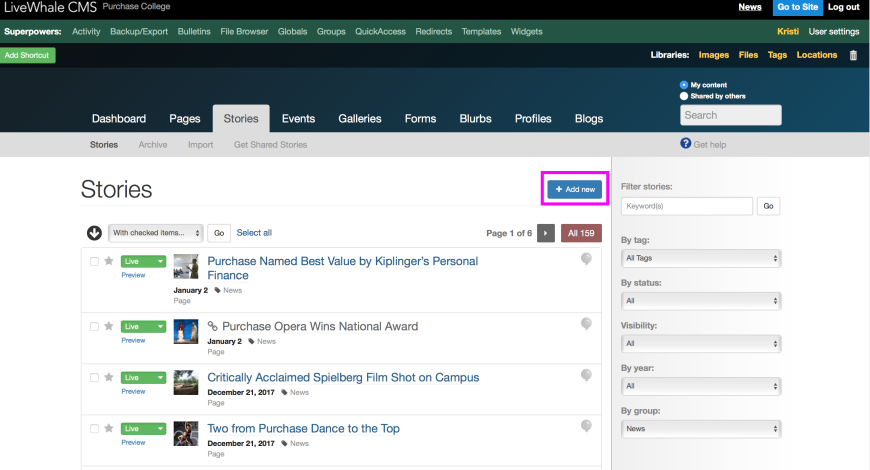
1. Select the Stories tab in the dashboard.
2. Select the blue “+ Add New” button. A blank story window will open.
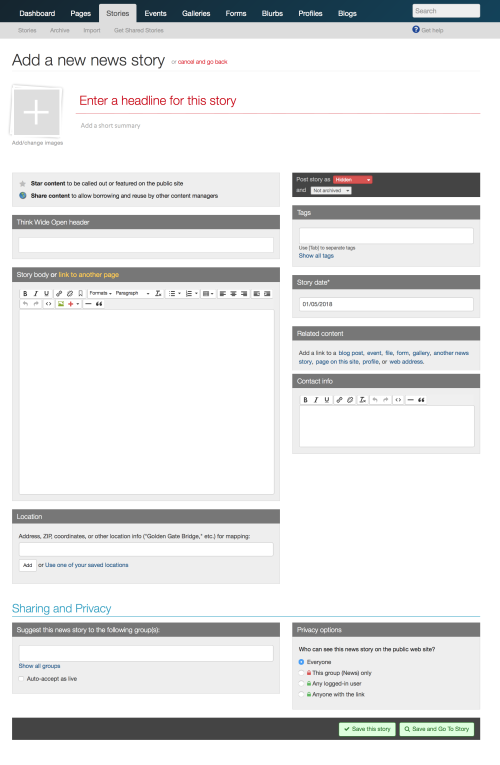
3. Enter a Headline, Summary, and Body copy. In your body copy, always create Links to faculty member profiles, academic programs, email addresses, and any other pertinent information on the purchase.edu site for readers to find more information.
Hint: Never repeat the summary in the story body. It will repeat twice on the live story page. Either use a brief summary or use the first body copy sentence as the summary.
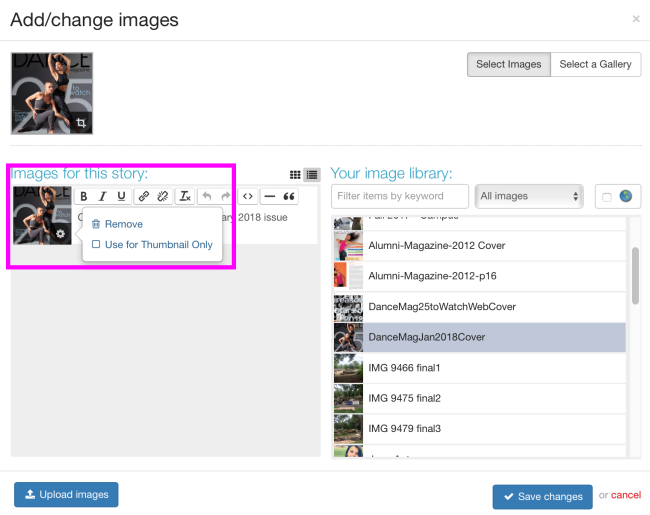
4. Add an Image. Select the large white plus sign to the left of the headline. The images already uploaded into your group’s image library will appear on the right. You can also choose to add a new image from your computer by selecting the blue Upload Images button in the lower left. Click on one or more of the images and they’ll appear on in the box on the left. Read more about managing Images here.
Hint: You can filter your images by keyword or by year, tags, or collections. You can also check to box next to the globe to see all the photos uploaded by others and shared in the CMS.
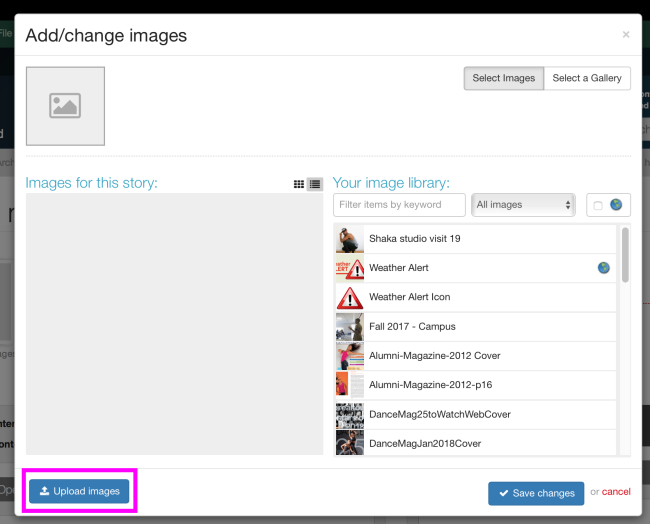
To remove an image, simply click on it in the right hand column, or select the Settings gear on the lower right of the thumbnail and select remove.
5. Add a Think Wide Open header if desired.
Hint: The Think Wide Open header is only necessary if the story will be shared with the School of the Arts, the School of Liberal Arts and Sciences, and/or the Homepage. If it’s left blank, it will default to the group in which the story was created, e.g., a story created in the Graphic Design group will read “Graphic Design” on the homepage if left blank.
6. Under Sharing and Privacy, add all groups with which you’d like to share the story. Begin typing a group name and options will appear. Alternatively, select Show All Groups and choose from the list provided. Privacy options can limit who views stories. Select everyone, or limit stories only to those logged in, or anyone with a link. You can also allow them to be seen only by users in your group.
Hint: Think about sharing up, down, and across. If it’s a story posted in an academic program, share across with related programs in the same and other schools, and share up with the program’s school.
For larger stories that help tell the brand story to prospective students and wider audiences, share with the Homepage and News groups. For stories meant for a current student audience, share with the Portals group.
7. Add Tags if desired. Create a new one or choose from those already created by selecting Show All Tags to see the existing tags list. See more about tags in the Important Hints section below.
Hint: Tags can help organize your stories in the dashboard. With a little widget manipulation (provided by C+CS), they can also help pull certain categories of stories onto specified pages. An example of this is the Faculty page in the Academics group. All stories in the Academics group do not appear on the Faculty page, only those tagged with Faculty do.
8. Under Related Content, select other pages or content type (news, profiles, events, etc) that make sense to be associated with the story.You can also add outside URLs.
Hint: If it’s a story intended for prospective students, you can add links to the Apply Now or Visit pages in Admissions, or provide links to related offices and services.
9. Stories can be marked as Live, Hidden, or given specific scheduled go-live dates. They can be archived, or set to expire at a specific date as well.
10. Enter contact information if relevant. If you reuse the same contact information over and over, it can be added to your group as default contact info so you won’t have to enter it repeatedly.
11. If your story relates to something that happened away from campus, add a location (and map) to your story to make it more interesting and engaging.
12. By default, the globe is selected which means your story is shared—as in other groups may link to your story using the Get Shared Stories option. But use the Sharing option to push the story to specific groups as outlined above under Sharing and Privacy.
13. Select a story title in the dashboard to open for editing.
Story Dashboard Basics
- The right sidebar includes a variety of options for filtering the stories you see in the manager: by tag, status (Live/Hidden), visibility, year, and group (for site administrators).
- Stories are listed (on both the front and back end) by newest first. However, if you attach a balloon to a story, it floats to the top of the list.
- You can add a star (for featured items), mark a story as live or hidden, or add balloons from the manager.
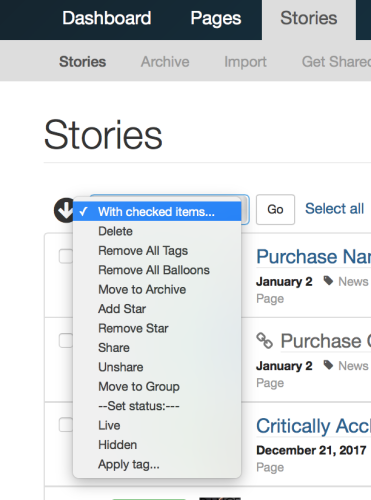
- By selecting the check boxes next to multiple items and using the With checked items… dropdown menu, you can perform several bulk edit operations.