Forms
Forms are a great way to capture information from users. Forms collect data into a database in the CMS, which can then be viewed or exported. Settings allow the CMS to send email notifications when forms are completed.
Consider using forms to repurpose your old surveys and fillable PDFs to achieve ADA-compliance.
The “Forms” tab will list all forms in your group. You can edit/delete or view form submissions from here. You can also embed forms onto your page.
Adding/Editing a Form
- Click the “Forms” tab from the LiveWhale dashboard.
- If you are adding a form, click “+Add a New Form,” otherwise find and click on an existing form to edit.
- Fill out the form with your content. See form options and descriptions below.
- When finished, click the “Save this form” button at the bottom. We suggest testing your form.
Form Options
Option Description Title Required: Enter the title of the form Star If this content is especially important you can flag it as important, click the star in the section labeled “Star content” in order to highlight it. Share content Click the globe labeled “Share content” to allow borrowing and reuse by other content managers. Introductory Text Enter a brief introductory text, such as instructions to the user about what the form is and how to fill it out. Thank you text Enter a thank you text, visible to the user upon form submission. Form Elements Construct the form by adding as many form elements as you need. To add a new element, click “Add another element.” To reorder elements, drag an element by the crosshairs icon to a new position in the list. For each element, you will be able to set the element’s label, type, whether or not it is required, instructional/help text, and a list of possible options if appropriate for the element type. Status Scroll back up and find the status menu at the top righthand corner of the screen. Choose the status for this form. “Live” will allow the form to be selected and placed on a page. “Hidden” will hide it from selection menu. Tag Tag the form with any relevant tags. Tags help sort and classify forms. Tags are not necessary. You can click in the field labeled “Tags” and type a keyword; tags will be suggested to you, or you can create a new tag. If you are unsure what tags are available in your group, click “Show all tags” to display them all and select the relevant ones. Form Action Choose a destination for the data submitted by users. You have the option of storing it in the database, e-mailing it, or both. If you choose to have it e-mailed, you will be presented with an additional field for an e-mail address(s). Email addresses should be comma-separated. Only accept submissions Restrict submissions to a particular range of dates, enter those dates in the section labeled “Only accept submissions on dates.” SSL security If this form should be secured using SSL (HTTPS), check the box labeled, “This is a secure form.” This only needs to be used if sensitive data is being transmitted to the server by visitors to the site.
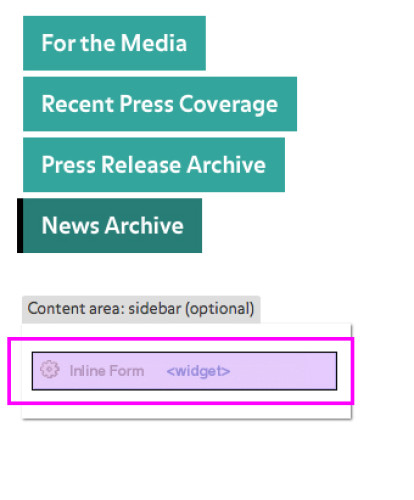
Embedding a form in a web page
- Navigate to the webpage on which you’d like to place the form and select “Edit Page.”
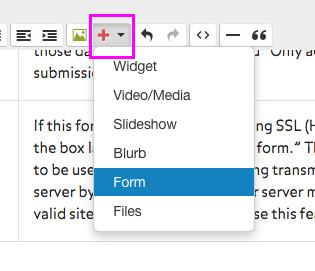
- From the editor’s toolbar, select Form from the widget (red +) drop down menu.
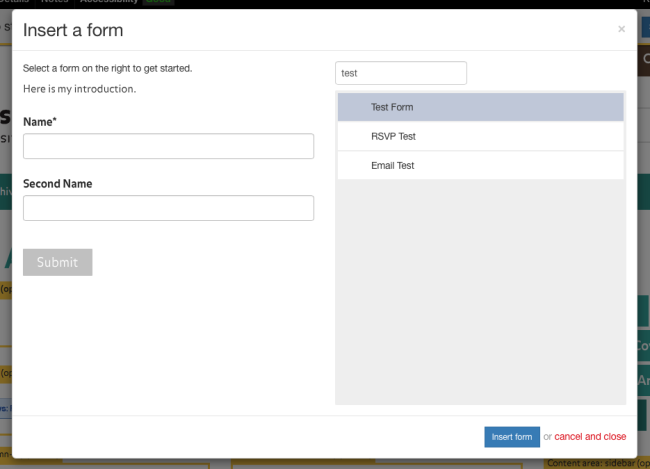
- Select the form you wish to display on your page. A preview of the from will appear on the left side of the dialog box.
- Then choose the Insert Form button on the bottom right.
Viewing and exporting form submissions
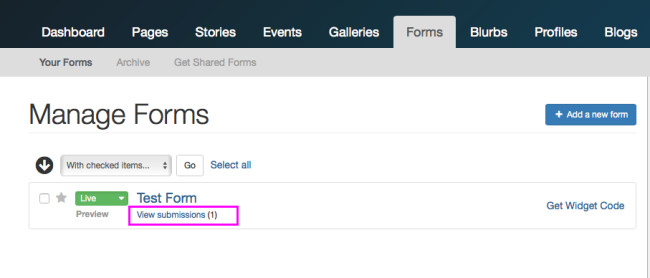
- From the Forms tab, find the form you wish to view submissions from, and select “View Submissions.”
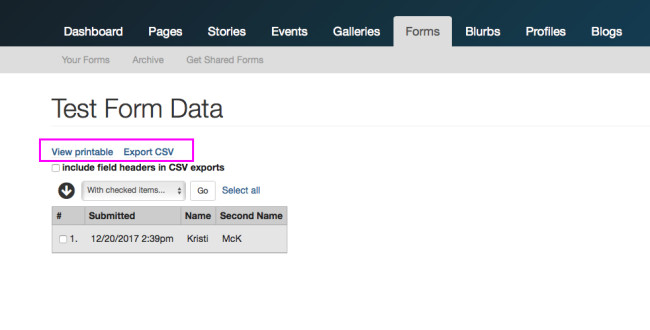
- You can view the results in a print-friendly format or download the results into a Comma-Separated-Value (CSV) file for use in Excel.
- “View Submissions” will not visible until a submission is made.
- Select the checkbox to insert headers into the .csv file.
Deleting a Form from the Dashboard
- From the Forms tab in the dashboard, find the form (of forms) you wish to delete and check the box next to it.
- Choose “Delete” from the drop down menu above.
- Select “Go” to the right of the drop down menu.
Removing a Form from a Webpage
- Navigate to the page holding the form and select “Edit Page.”
- Find the Form Widget that was placed on the page.
- Click on the widget so it’s highlighted and delete.
- Conversely, you can leave the widget on the page, and mark your form as “Hidden” in the dashboard. The form will no longer be pulled onto the page by the Form Widget.
More information on labels, errors, and forms (?AP)
Note: This section is more complex than the others. If it’s too complicated, consider skipping it for now and proceeding through the remaining checks.
Labels, keyboard access, clear instructions, and effective error handling are important for forms accessibility.
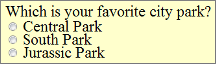
Form fields and other form controls usually have visible labels, such as “E-mail Address:” as the label for a text field.
![]()
When these labels are marked up correctly, people can interact with them using only the keyboard, using voice input, and using screen readers. Also, the label itself becomes clickable, increasing the target area and making it easier to select small radio buttons or checkboxes.
What to do:
Find any forms on the page. A form could be a single text box, such as Search, or could be a complex form with text fields, radio buttons, checkboxes, drop-down lists, and buttons.
What to check for:
Keyboard access
- Check that all form controls are keyboard accessible by following the keyboard access checks above, including checking that you can get to all items in any drop-down lists.
Labels
- Check that every form control has a label associated with it using ‘label’, ‘for’, and ‘id’, as shown in the labels checks below. (This is best practice in most cases, though not a requirement because a form control label can be associated in other ways.)
- Check that the labels are positioned correctly. For left-to-right languages, labels should usually be:
- Left of text boxes and drop-down lists.

- Right of radio buttons and checkboxes.
- Left of text boxes and drop-down lists.
Required fields and other instructions
- Check that any fields that are required/mandatory are clearly indicated.
- Check that the indicator does not rely on color alone, for example, if required fields were only indicated by red colored labels, they would not be accessible to people who do not see the different colors.
- Check that the indicator (such as asterisks (*)) is included in the marked up field label for text boxes and drop-down lists, or legend for radio buttons and checkboxes, as shown in the labels checks below.
- Check that any instructions for completing the form are before they are needed, for example,
- General instructions should usually be at the top of the form or the section they relate to.
- Check that required formats, such as dates (year-month-date in the format 0000-00-00), are included in the marked up label, using the labels checks below.
Error handling
Some simple forms, such as a single search field, might not have any errors. If you think the form(s) on the page you are checking might have error messages, try leaving required fields blank or entering incorrectly-formatted information (such as telephone number or e-mail address), then submitting the form. If you get errors:
- Check that clear and specific guidance is provided to help people understand and fix the error. If the error concerns a format such as date, time, or address, check that the correct format is clearly explained.
- Check that the errors are easily findable. Generally it is best if the error messages are before the form, rather than after the form.
- Check that the fields without errors are still populated with the data you entered. (This is best practice, though not a requirement.) People should not have to re-enter all the information in the form, except for some sensitive data such as credit card numbers.
Status: Updated 9 August 2017 [changelog] “Easy Checks - A First Review of Web Accessibility” was first published as a draft in June 2013. It replaces “Preliminary Review of Web Sites for Accessibility” that was first published September 2005 and edited by Shadi Abou-Zahra. It was originally one section of “Evaluating Web Sites for Accessibility” that was first published in October 2001 and edited by Judy Brewer and Chuck Letourneau. Editor: Shawn Lawton Henry. Contributors: Sharron Rush, Suzette Keith, Anna Belle Leiserson, Andrew Arch, Wayne Dick, Eric Eggert, Caleb Watson, Vicki Menezes Miller, Jennifer Sutton, Ian Pouncey, Denis Boudreau, Tom Jewett, and participants of the Education and Outreach Working Group (EOWG). Copyright © 2016 W3C ® (MIT, ERCIM, Keio, Beihang) Usage policies apply.